Crafting a Resilient VPC Landscape using Terraform

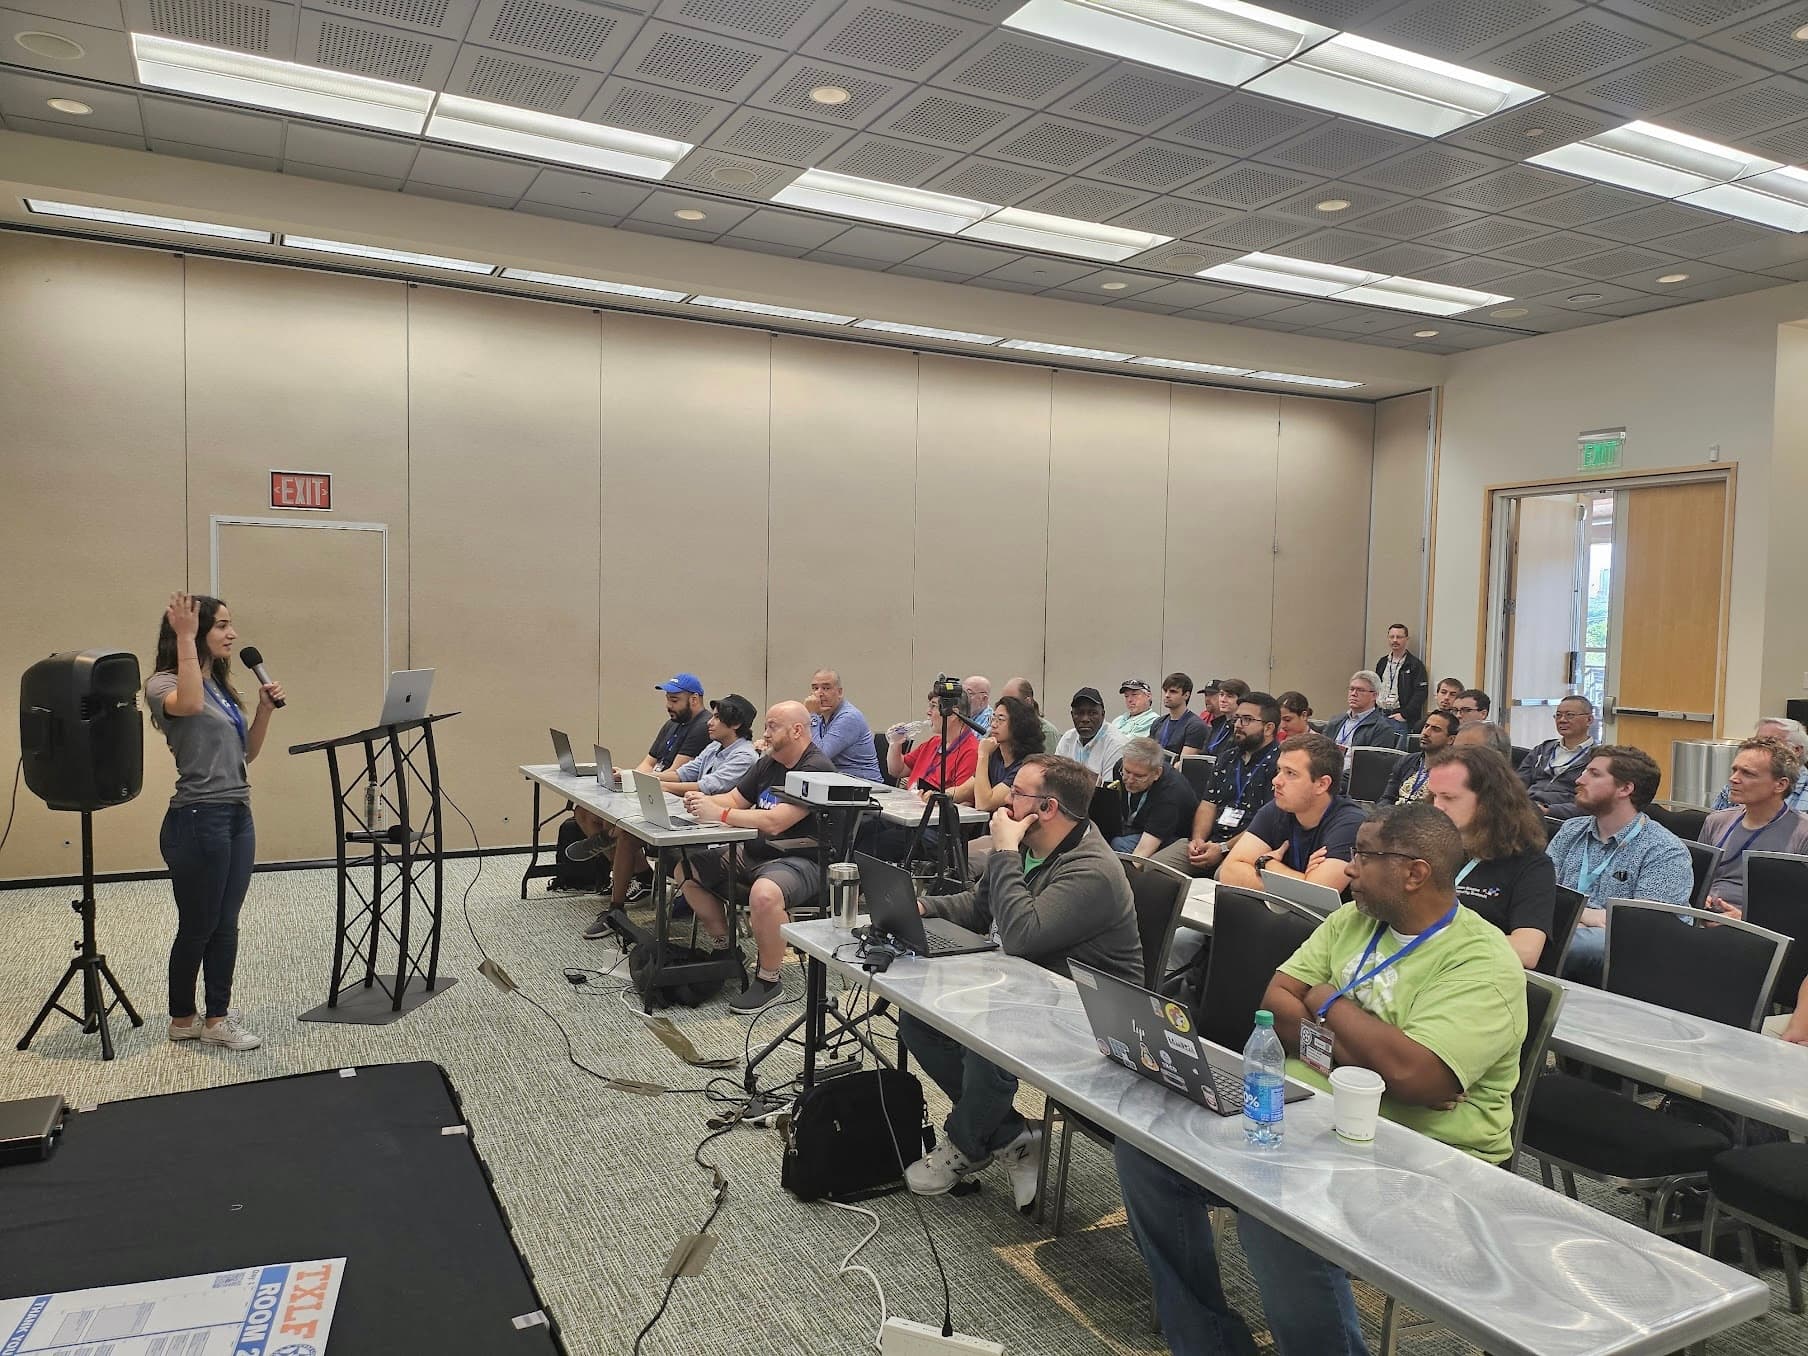
Hello World! I'm Talia, a Staff Developer Advocate at Postman and international keynote speaker.
Last week, we released our Virtual Private Cloud (VPC). Akamai’s VPC offers an isolated network that lets cloud resources privately communicate with each other.
What excites me about this release is the flexibility you have in setting up your VPC. You can add compute instances via your cloud provider’s UI, Cloud Manager, developer tools like a CLI, or my personal favorite, infrastructure as code tools like Terraform. In this blog, I’ll take you through the journey of deploying a VPC and dynamically adding subnets using Terraform.
I chose Terraform because you can see all of your configurations for your application in one place, allowing you to replicate resources in another environment, move resources to different accounts, etc. It’s essentially your one source of truth, eliminating configuration drift. If you’re new to Terraform or infrastructure as code, this video guides you through creating a compute instance with the Linode Terraform Provider. That should get you on the right track to continue with this tutorial.
Prerequisites
Before we begin, make sure you have the following:
A Linode account. If you don't have one, sign up for a free Linode account.
A personal access token for Linode’s v4 API: Terraform uses this to interact with your Linode resources. Follow this guide to generate your token.
Terraform installed on your local machine. If you don't have it, follow our guide to installing and setting up your environment.
Basic knowledge of how to use the command line.
Step 1: Create your Terraform Configuration File
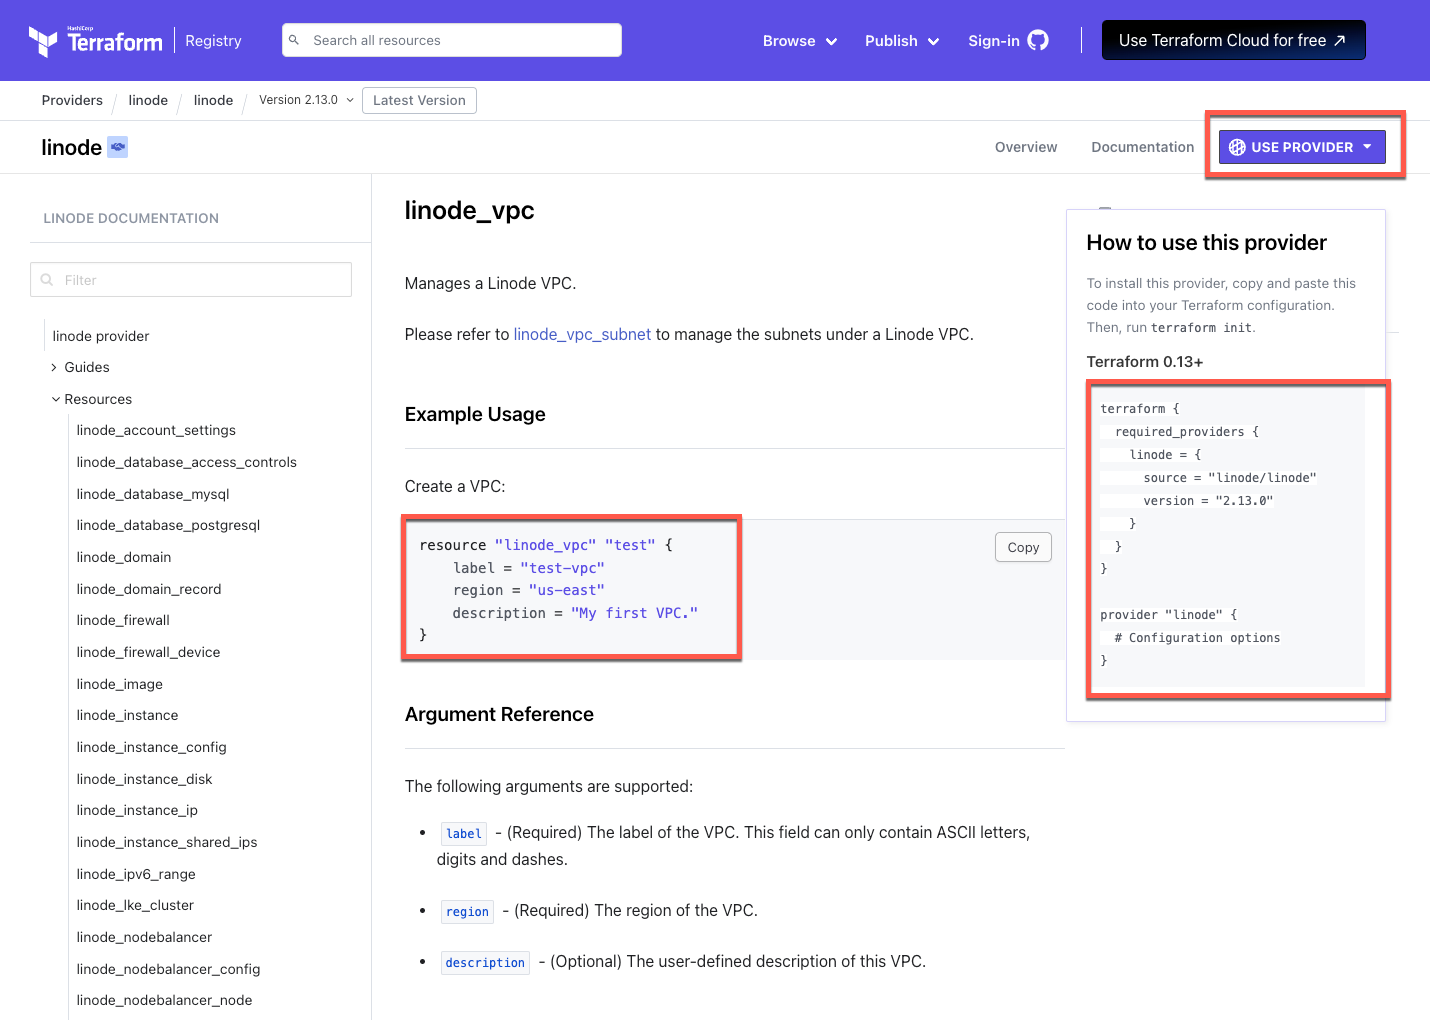
Let’s start by setting up the Linode Provider for Terraform. I created a new directory for my Terraform project and made a file called terraform.tf. Instead of building the configuration file from scratch, I utilized the Terraform registry. If you’ve never used an infrastructure as code registry, watch this video to learn more.
First, find the Linode VPC from the Terraform Registry. On the right hand side of the page, click on Use Provider, and copy the code from the dropdown into your terraform.tf file. Then, copy and paste the code from the Example Usage section for the VPC.
Your configuration file should look like this:
Note that you’ll need to replace your authorized key and root password as well.
terraform {
  required_providers {
    linode = {
      source = "linode/linode"
      version = "2.13.0"
    }
  }
}

provider "linode" {
  token = "your_api_token"
}

resource "linode_vpc" "test" {
    label = "test-vpc"
    region = "us-iad"
    description = "My first VPC."
}
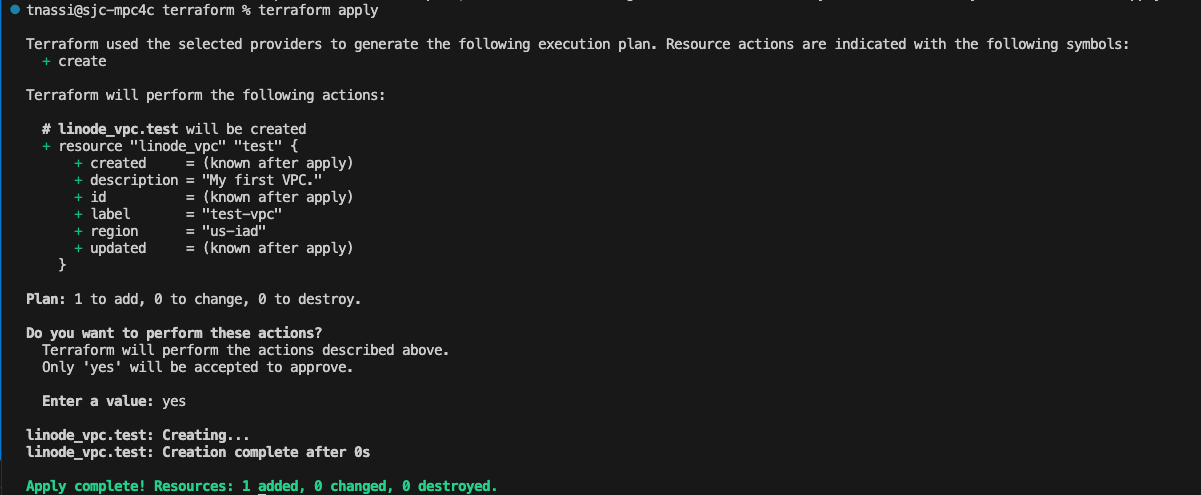
Step 2: Deploy your Configuration File
To deploy your configuration file, enter: terraform plan
Then, enter: terraform apply
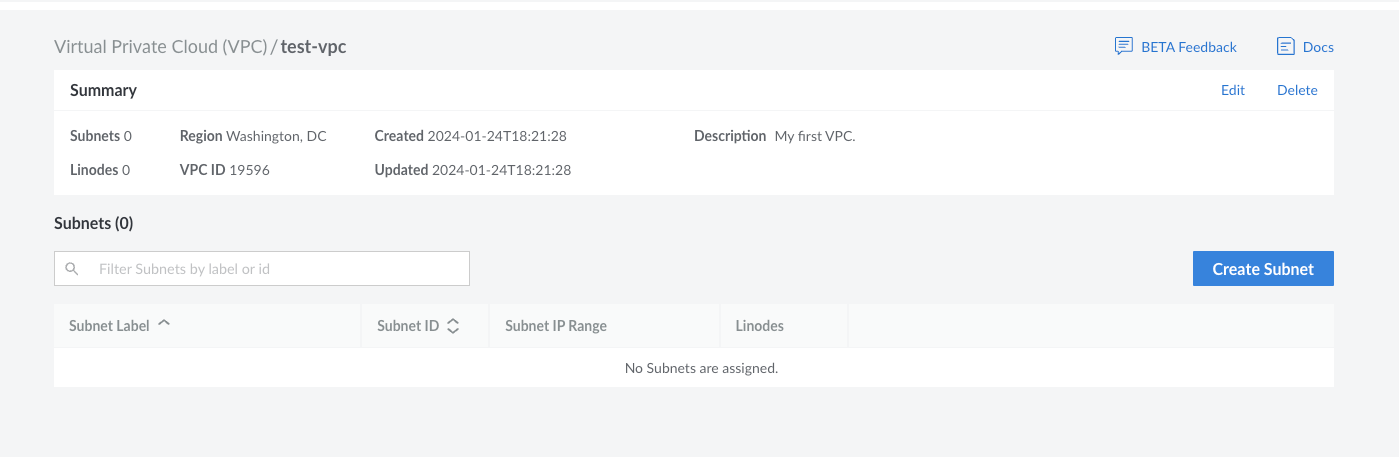
Now, when you go to your cloud dashboard, you’ll see your VPC listed.
Using Infrastructure as Code for deploying a VPC provides greater control, consistency, agility, and efficiency in managing your cloud infrastructure while reducing the likelihood of human error and enabling faster, more reliable deployments.
Step 3: Add Subnets to your VPC
Adding subnets to my VPC is an essential aspect of architecting a well-organized, secure, and scalable cloud infrastructure that aligns with the specific needs of my applications and services. By adding subnets, I can logically segment my VPC into smaller, more manageable networks. This segmentation is beneficial for organizing resources based on functionality, security needs, or other considerations. For instance, I might have separate subnets for web servers, databases, and application components.
Subnets also allow me to efficiently manage IP addresses within my VPC. Each subnet operates within its designated IP address range, preventing conflicts and providing a structured approach to IP address allocation. This becomes increasingly important as my infrastructure scales and more resources are deployed.
Subnets act as security boundaries, enabling me to implement different security measures for each subnet based on the sensitivity of the resources they host. For example, I can apply stricter security rules to a database subnet compared to a public-facing web server subnet. This helps in implementing the principle of least privilege.
Subnets play a crucial role in routing and optimizing network traffic within the VPC. I can configure routing tables to direct traffic between different subnets based on specific requirements. This flexibility allows me to design the most efficient communication paths for my applications.
Now, let’s add a couple subnets to the VPC. Edit your terraform.tf and add a vpc_subnet resource block.
Note that you’ll need to replace your vpc_id. Find this in your cloud dashboard below.

resource "linode_vpc_subnet" "vpc-subnet-terraform-subnet-01" {
    vpc_id = "your_vpc_id"
    label = "vpc-subnet-terraform-subnet-01"
    ipv4 = "192.168.1.0/24"
}

resource "linode_vpc_subnet" "vpc-subnet-terraform-subnet-02" {
    vpc_id = "your_vpc_id"
    label = "vpc-subnet-terraform-subnet-02"
    ipv4 = "10.0.0.0/24"
}
Run terraform apply to apply the changes.
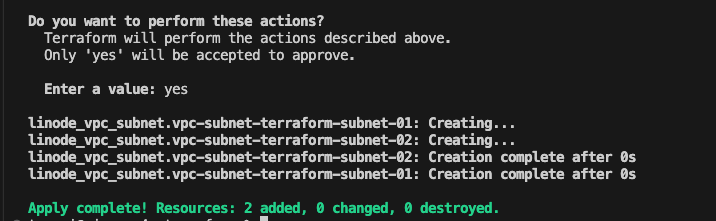
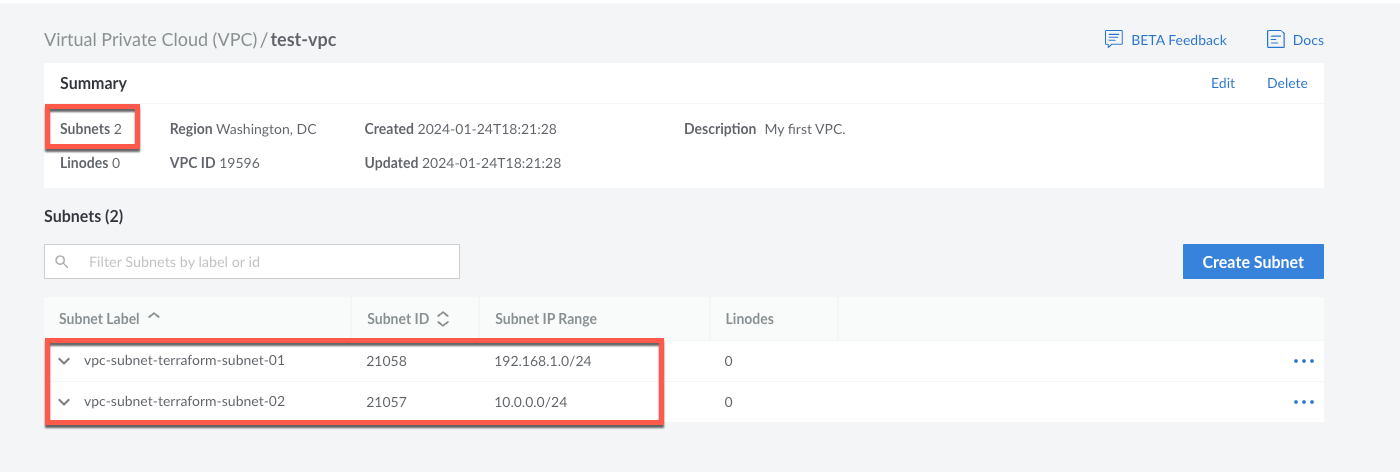
Now your VPC has 2 subnets. Navigate to the cloud manager to see the changes:
Notes:
You should have one
vpc_subnetresource block per subnetThe ipv4 of a subnet within the same VPC must not have any overlap
Differentiating between Akamai’s VPC and the Hyperscalers
One of the standout features of Akamai's VPC that I find truly remarkable is its flexibility when it comes to defining subnets. In many traditional hyperscalers, such as AWS and Azure, there's a rigid requirement that all subnets within a VPC must share the same RFC1918 range or block. This essentially means that once you set a top-level CIDR range for your VPC, all subnets within it are confined to that particular address space.
However, Akamai takes a different and, in my opinion, more versatile approach. With Akamai’s VPC, each subnet is allowed to exist in its own RFC1918 range or block. This means that you have the freedom to design your network architecture in a way that best suits your specific use case. For instance, you can have one subnet operating in the 192.168/16 space and another in the 10/8 space, all within the same VPC.
This flexibility is a game-changer, especially as your application or business needs evolve. Unlike the constraints imposed by some hyperscalers, Akamai's VPC enables dynamic addition of subnets with different ranges. So, if your requirements change or your application scales, you can effortlessly integrate new subnets without being bound by the limitations of a predetermined top-level CIDR range. It’s a level of adaptability that caters to the diverse networking demands of modern cloud architectures. This is a feature that sets Akamai's VPC apart, offering a level of customization and scalability that aligns seamlessly with the dynamic nature of today’s cloud environments.
More Resources
Connect with the Akamai team and fellow users in the Akamai VPC discussion group dedicated to our VPC feature (click here to sign up if you’re not a member).
You can also check out our VPC documentation for more information and help getting started.
Thanks for reading! For all things cloud, follow me by clicking the follow button at the top of this page, subscribe to my newsletter below, and follow me on Twitter!